Monday, July 16, 2018

OAC : Fixing NULL value in prompts

We have been seeing this over the years in many different cases, NULL values appearing in prompts. There are certain workarounds like making the column not nullable etc, but this might impact the actual reporting in many ways.

So, the easy way would be to restrict the workaround to prompts.


We just have that, Just like in OBIEE 12c we have some tags for prompts in instanceconfig.xml

The instanceconfig.xml file is located in below location
[BI_DOMAIN]/config/fmwconfig/biconfig/OBIPS
Add the below tag in the prompts section of ServerInstance
<ServerInstance>
  <Prompts>
    <MaxDropDownValues>256</MaxDropDownValues>
    <ResultRowLimit>65000</ResultRowLimit>
    <AutoApplyDashboardPromptValues>true</AutoApplyDashboardPromptValues>
    <AutoSearchPromptDialogBox>true</AutoSearchPromptDialogBox>
    <AutoCompletePromptDropDowns>
      <SupportAutoComplete>true</SupportAutoComplete>
      <CaseInsensitive>true</CaseInsensitive>
      <MatchingLevel>MatchAll</MatchingLevel>
      <ResultsLimit>50</ResultsLimit>
    </AutoCompletePromptDropDowns>
    <ShowNullValueWhenColumnIsNullable>never</ShowNullValueWhenColumnIsNullable>
  </Prompts>
</ServerInstance>

Save the file and restart the services. Ideally, a restart of the Presentation Services component should be enough, if the changes don't come to effect, do a complete restart.


Friday, July 13, 2018

Provisioning Oracle Database Cloud Service (DBCS)

In the series for Oracle Analytics Cloud introduction, this post will cover one of its prerequisites Oracle Database Cloud Service. As directed in my previous post
Introduction to Oracle Analytics Cloud Series and Pre-requisites one should have valid Cloud account credentials for provisioning services.

Below will be step by step procedure in creating an Oracle Database Cloud Service instance.


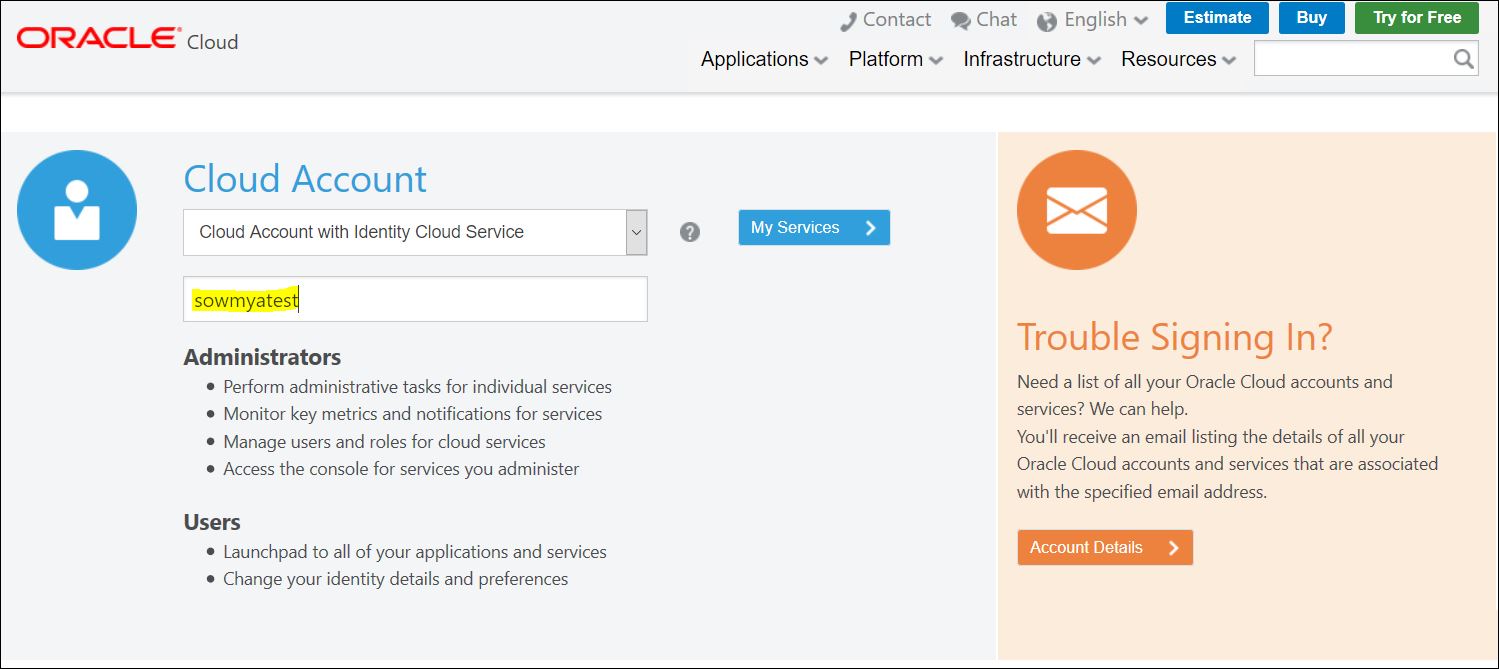
  • Enter the Identity Domain as choose during the registration or as received and click on My Services.
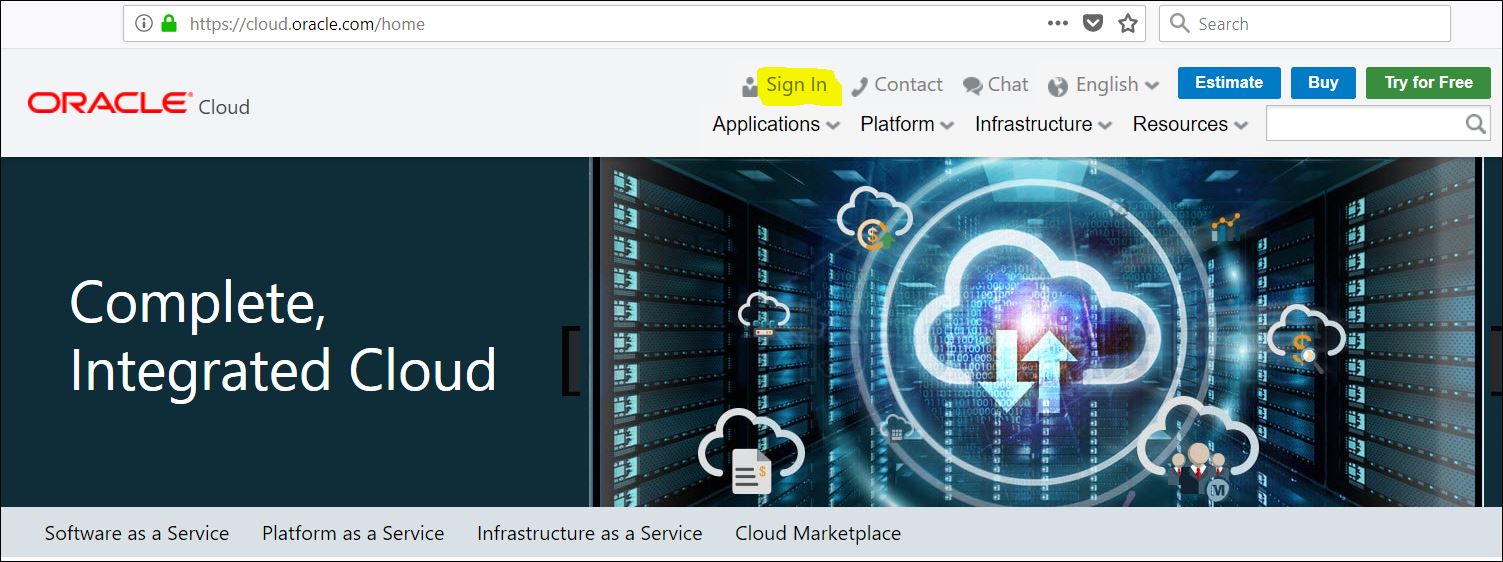
  • Enter your credentials in the login page and click Sign In


  •  We will be taken to our Services Dashboard as shown below.


  • Click on the symbol on the left top corner of my services dashboard.
  • Select the Drop down next to Services and Click Database


  • Click Create Instance as shown in the image.


  • Give a name to the Database something like DBCS, Software release should be 12c Release 1 as OAC is not certified with 12c release 2. A single instance would suffice

  • Give values as shown in the below screenshot. Password chosen here is Admin123#. These will be sufficient for use with an Oracle Analytics Cloud, for using as a Database for tables etc.. you might have to change based on usage. Click Edit next to SSH Public Key. 


  • Select 'Create New Key' if you do not have a public key already and click 'Enter'


  • Click Download to get the key pair, which will be used for SSH access to the DBCS instance.


  • Click Next as shown below


  • Click Create.


  • It takes around 30 minutes for the instance to provision and once it is done you will see this screen.

Introduction to Oracle Analytics Cloud Series and Pre-requisites

It has been a while since I wrote a post, I have been working on Oracle cloud platform in the areas of Business Analytics and Big Data. As a starting point, I want to write a series of posts around provisioning and usage of Oracle PaaS services targetting areas around Business Analytics.

Oracle Database Cloud Service: This is the first and most popular Oracle Cloud service for GA. As leaders in the Database engine for over 4 decades the cloud service is also efficient like the on-prem. We would require an Oracle Database Cloud Service as a pre-requisite to the Oracle Analytics Cloud service for the purpose of storing metadata, commonly know as RCU schemas. Learn more about DBCS from here

Oracle Storage Cloud ServiceThis is one of the most common cloud services which you might be already aware of. Storage cloud service is meant for object storage. Everything in the cloud would need storage for the purpose of backup, logs etc. Oracle Analytics Cloud would also require storage of the same purpose of Logs & backups. Learn more about Storage Cloud from here

Oracle Analytics Cloud Service: Analytics cloud service is a combination of Oracle Business Intelligence Cloud Service, Oracle Data Visualization Cloud Service, and Oracle Essbase Cloud Service. So an Oracle Analytics Cloud service would essentially give all these packaged together under one license. Learn more on Analytics Cloud from here

In order to provision an Oracle Analytics Cloud service, below are the pre-requisites.

  1. Cloud Account - Identity Domain, Username/Email, Password 
  2. Oracle Database Cloud Service - Provisioned and Ready to use
  3. Oracle Storage Cloud Service - Either a Container Created or Storage Admin Credentials for creating while provisioning.
In case you do not have a cloud account, you can try the Cloud for free with a promotional account having 400SGD credit for 30 days. Register for a cloud account at https://cloud.oracle.com.


Tuesday, February 13, 2018

R Studio : Warning: unable to move temporary installation

Was trying to install some packages using the install.packages() command and was facing some strange issue with below error.


Warning: unable to move temporary installation 'C:\Oracle\R-3.4.2\library\file6cae3bcf\MASS' to 'C:\Oracle\R-3.4.2\library\MASS'

Warning: unable to move temporary installation 'C:\Oracle\R-3.4.2\library\file6cae3bcf\MASS' to 'C:\Oracle\R-3.4.2\library\MASS'

Initially I was considering the permissions problem so i tried running the install.packages() command from cmd line as an administrator. Also gave full control on R installation directory to all users. Nothing worked.

Finally I was able to find solution from some random function mentioned R documentation. What actually is happening is that R is trying to install the mentioned package but is also interrupting it, interesting right.

Lets see in detail, when an install.packages() command is executed R will download the package to temp space, extract it and then place it in library path. But the extracting and copying are performed very closely that they are practically happening at the same time. All I had to do was insert some lag between them, otherwise put R to sleep for sometime.

Which can be performed using  Sys.sleep(time) command, the default value used in "unpackPkgZip" utility which is used to extract the downloaded packages is 0.5 sec, we will increase it to may be 2.5 or 3 etc. as follows.

The below command will open the unpackPkgZip utility code in edit mode

trace(utils:::unpackPkgZip, edit=TRUE)

Go to Sys.sleep(0.5) and replace it with 2.5 and save.

Now run the install.packages("MASS") which should run with out any errors.

Wednesday, August 23, 2017

OBIEE 12c : Environment Variables on Linux

This is just a quick one for all those who want to what environment variables should be set to use the OBIEE 12c environment on Linux environment. Make sure to include this list in the .bash_profile file of the Linux user used to run the OBIEE Application.

For those who are not aware of the .bash_profile location, the file will be in hidden mode in user home directory ( generally the directory you will be landed as soon as you login ). Can also find from environment variable HOME as per below.

[oracle@MyLinux oracle]$ pwd
/user/oracle
[oracle@MyLinux oracle]$echo $HOME
/user/oracle
[oracle@MyLinux oracle]$ l.

You can see the same using WinSCP. The assumptions here are OBIEE is installed as per below

/oracle/applications/OBIEE12c - Software Installtion
/oracle/applications/OBIEE12c/Domain_Home - Domain is installed here
/oracle/applications/OBIEE12c/Oracle_Home - FMW is installation directory

Open the .bash_profile file and add the below as needed

PATH=$PATH:$HOME/.local/bin:$HOME/bin
export JAVA_HOME=/oracle/applications/Java/jdk1.8.0_144
export LANG=en_US.UTF-8
export DOMAIN_HOME=/oracle/applications/OBIEE12c/Domain_Home/bi
export ORACLE_HOME=/oracle/applications/OBIEE12c/Oracle_Home
export BI_PRODUCT_HOME=/oracle/applications/OBIEE12c/Oracle_Home/bi
export BI_ORACLE_HOME=/oracle/applications/OBIEE12c/Oracle_Home/bi
export COMMON_COMPONENTS_HOME=$ORACLE_HOME/oracle_common
export ORACLE_DOMAIN_CONFIG_DIR=$DOMAIN_HOME/config/fmwconfig
export ORACLE_BI_ENVIRONMENT_DIR=$ORACLE_DOMAIN_CONFIG_DIR/bienv
export WL_HOME=$ORACLE_HOME/wlserver
export ORACLE_BI_CONFIG_DIR=$DOMAIN_HOME/config/fmwconfig/biconfig
export ODBCINI=/oracle/applications/OBIEE12c/Domain_Home/bi/config/fmwconfig/bienv/core/odbc.ini
export AMAZONREDSHIFTODBC=/userhome/oraclebi/.amazon.redshiftodbc.ini 
export ODBCHOME=/opt/amazon/redshiftodbc
export LIBPATH=$ODBCHOME/lib/64
export LD_LIBRARY_PATH=/opt/amazon/redshiftodbc/lib/64:/usr/local/lib:$ODBCHOME/lib/64:/usr/lib64:/usr/lib
export PATH=/oracle/applications/Java/jdk1.8.0_144/bin:$PATH:$ODBCHOME:/usr/lib64:/usr/lib:$JAVA_HOME/bin

Wednesday, August 16, 2017

Linux ODBC : GLIBCXX_3.4.20 not found, [RESOLVED]

I have done a setup of ODBC for Amazon Redshift on RedHat Linux 7.2 recently as per my earlier post OBIEE 12c: Amazon Redshift ODBC setup which was done a year ago.

All went well except i was not able to use the ODBC driver as it throws errors.

First i tried to see if my configuration was correct, the first step is to see if my DSN shows up or not.

To test this i use the odbcinst command 

[oracle@My-Linux ~]$ odbcinst -q -s
[ODBC]
[AnalyticsWeb]
[opss_datasource]
[biplatform_datasource]
[Redshift]

Next thing is to check if the DSN listed is working or not, which can be done using i sql

[oracle@My-Linux ~]$ isql -v Redshift
[01000][unixODBC][Driver Manager]Can't open lib '/opt/amazon/redshiftodbc/lib/64/libamazonredshiftodbc64.so' : file not found
[ISQL]ERROR: Could not SQLConnect

As the error says the file libamazonredshiftodbc64.so is not accessible for the ODBC manager, we will try and access the same to see if it has any issues.

[oracle@My-Linux ~]$ ldd /opt/amazon/redshiftodbc/lib/64/libamazonredshiftodbc64.so
/opt/amazon/redshiftodbc/lib/64/libamazonredshiftodbc64.so: /usr/lib64/libstdc++.so.6: version `GLIBCXX_3.4.20' not found (required by /opt/amazon/redshiftodbc/lib/64/libamazonredshiftodbc64.so)
        linux-vdso.so.1 =>  (0x00007fff88ffe000)
        libdl.so.2 => /usr/lib64/libdl.so.2 (0x00007faf36d23000)
        libpthread.so.0 => /usr/lib64/libpthread.so.0 (0x00007faf36b06000)
        librt.so.1 => /usr/lib64/librt.so.1 (0x00007faf368fe000)
        libstdc++.so.6 => /usr/lib64/libstdc++.so.6 (0x00007faf365f5000)
        libm.so.6 => /usr/lib64/libm.so.6 (0x00007faf362f2000)
        libgcc_s.so.1 => /usr/lib64/libgcc_s.so.1 (0x00007faf360dc000)
        libc.so.6 => /usr/lib64/libc.so.6 (0x00007faf35d1b000)
        /lib64/ld-linux-x86-64.so.2 (0x00007faf39937000)


You can now see that the GLIBCXX_3.4.20 was not found in libstdc++.so.6 library file. Let us see what the file has to confirm if its available or not.

[oracle@My-Linux ~]$ strings /usr/lib64/libstdc++.so.6 | grep GLIBCXX               
GLIBCXX_3.4
GLIBCXX_3.4.1
GLIBCXX_3.4.2
GLIBCXX_3.4.3
GLIBCXX_3.4.4
GLIBCXX_3.4.5
GLIBCXX_3.4.6
GLIBCXX_3.4.7
GLIBCXX_3.4.8
GLIBCXX_3.4.9
GLIBCXX_3.4.10
GLIBCXX_3.4.11
GLIBCXX_3.4.12
GLIBCXX_3.4.13
GLIBCXX_3.4.14
GLIBCXX_3.4.15
GLIBCXX_3.4.16
GLIBCXX_3.4.17
GLIBCXX_3.4.18
GLIBCXX_3.4.19
GLIBCXX_DEBUG_MESSAGE_LENGTH

So it is true that the GLIBCXX_3.4.20  is missing which is required by the Amazon driver, which is the root cause for the issue. Now lets see what can be done to resolve this.

We have to basically update the libstdc++ to a higher version which includes the GLIBCXX_3.4.20. For me the below command worked.

[oracle@My-Linux ~] yum update libstdc++

Depending on your OS you can update using different commands like

sudo apt-get install libstdc++6Above command will install it if not already donesudo add-apt-repository ppa:ubuntu-toolchain-r/test sudo apt-get updatesudo apt-get upgradesudo apt-get dist-upgrade

Now try and run the isql command with username and password to verify the connection.
[oracle@My-Linux ~]$ isql Redshift username password
+---------------------------------------+
| Connected! |
| |
| sql-statement |
| help [tablename] |
| quit |
| |
+---------------------------------------+
SQL>

Oracle DB : Get the Oracle Database version using a SQL Query

To find the Oracle DB Version to which you are connected now use the below queries.

select * from v$version;

The Results will be as below, The database version i used is 11.2.0.3

Oracle Database 11g Enterprise Edition Release 11.2.0.3.0 - 64bit Production
PL/SQL Release 11.2.0.3.0 - Production"CORE 11.2.0.3.0 Production"
TNS for Linux: Version 11.2.0.3.0 - Production
NLSRTL Version 11.2.0.3.0 - Production


Sometimes the above command may result in Table or view doesn't exist error, reason can be you are not a DBA.

The below can be used as an alternative.

select * from product_component_version;

The Results for the above command will be like below.

PRODUCT VERSION STATUS
NLSRTL 11.2.0.3.0 Production
Oracle Database 11g Enterprise Edition 11.2.0.3.0 64bit Production
PL/SQL 11.2.0.3.0 Production
TNS for Solaris: 11.2.0.3.0 Production