Monday, February 2, 2015

Repository Creation Utility - OBIEE 11g

Make sure we have the database ready up and running , with valid credentials and necessary details like Hostname,Port Number and Connection String. Extract the downloaded RCU file.

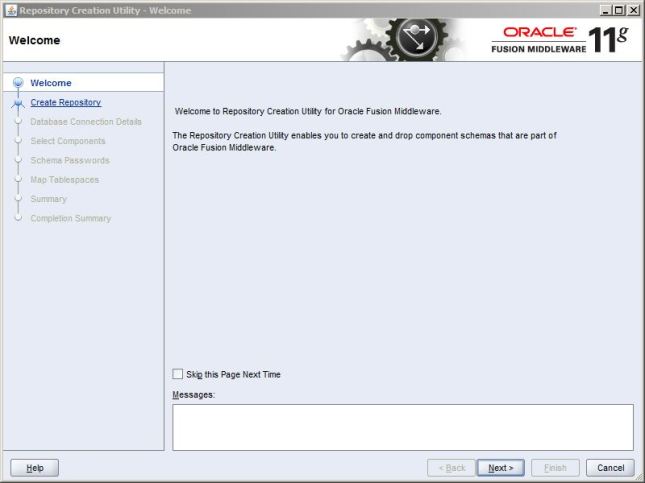
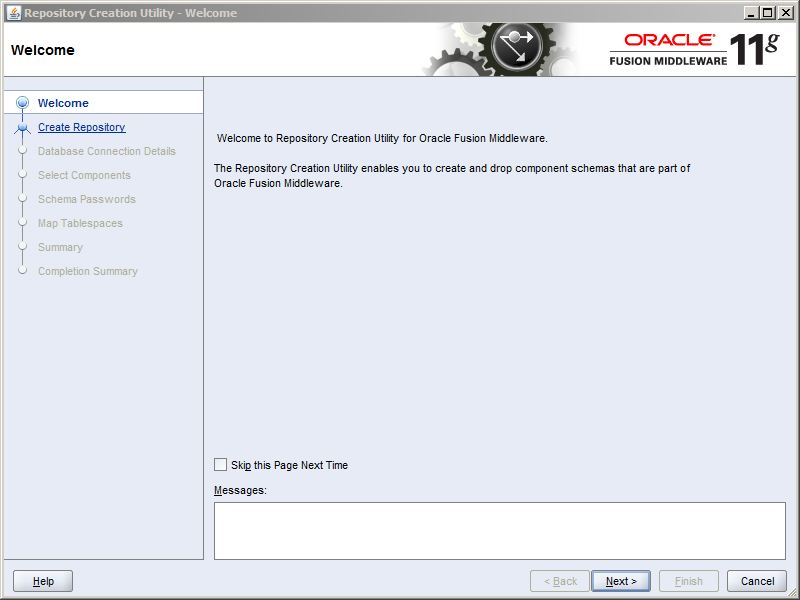
Navigate to RCU.bat which is located inside RCU folder –> BIN. The RCU Welcome screen pops up. Click Next


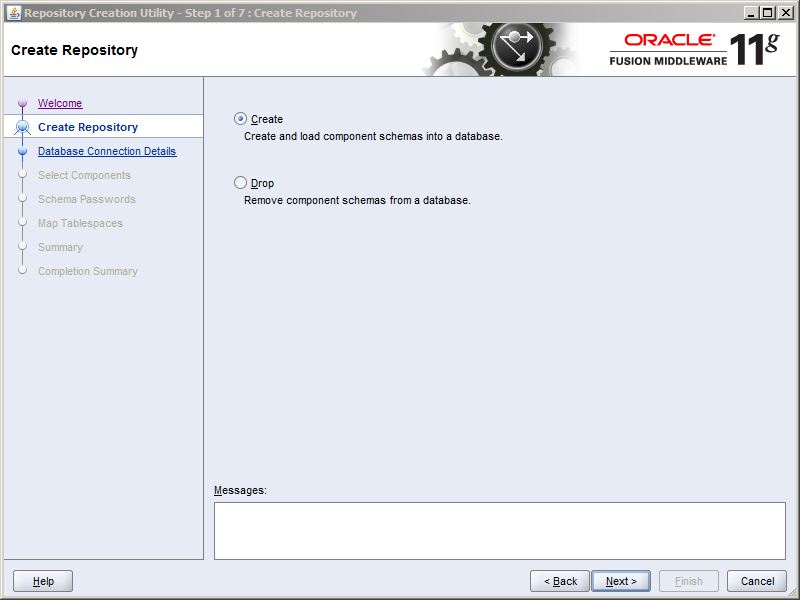
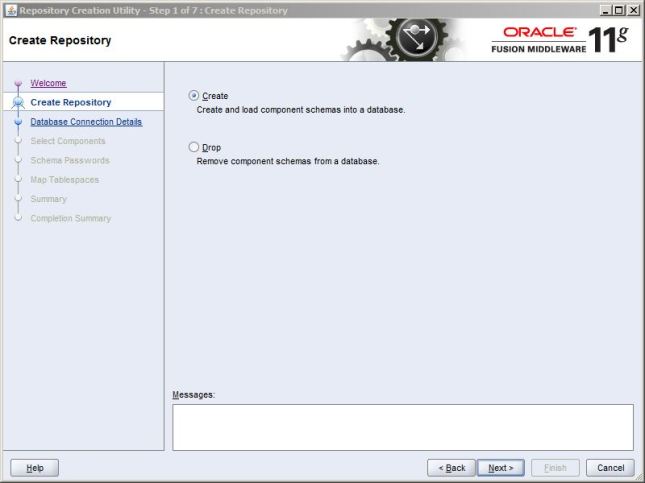
Select Create Radio button and click Next.


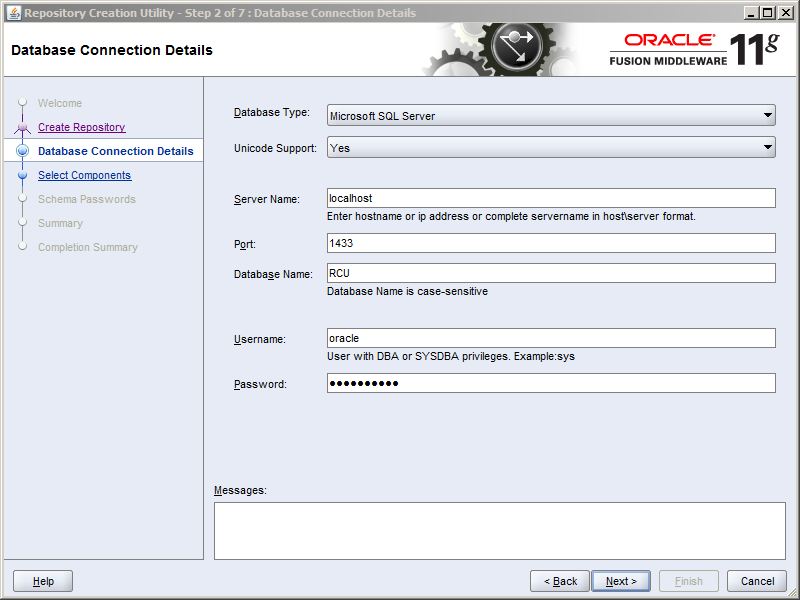
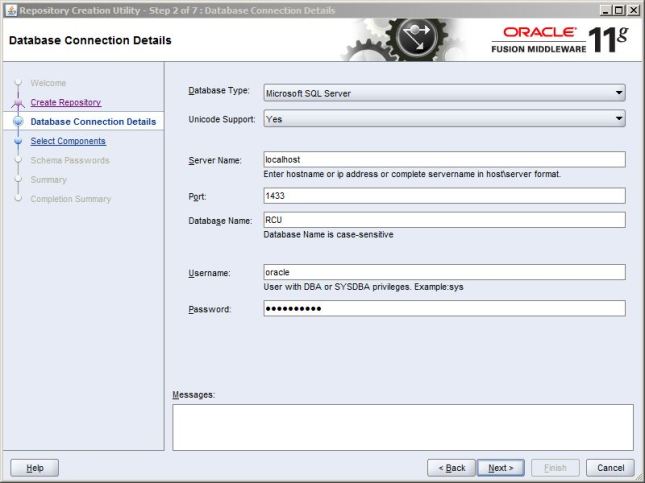
Under the Database Connection Details. Give the database details as we have collected earlier.
Server Name : Localhost
Port : 1521
Database Name : RCU
Username : Username to connect to RCU Database.
Password : Password to login to RCU Database.

Make Sure the username has DBA or SYSDBA Privileges. And then Click Next


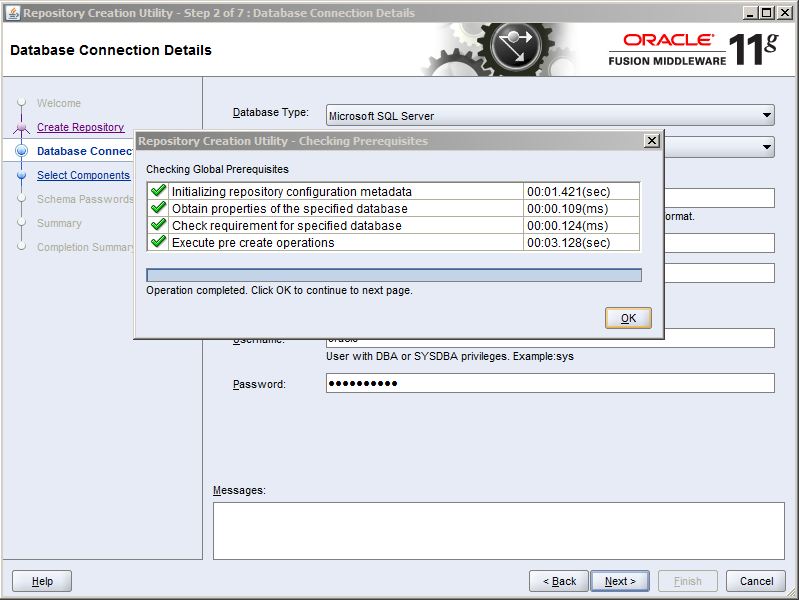
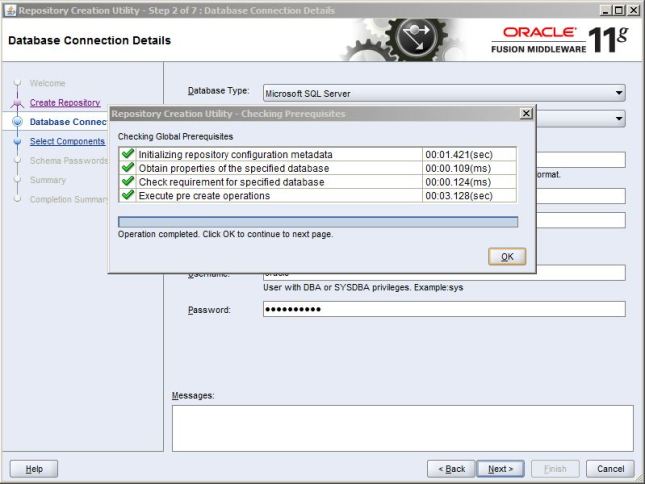
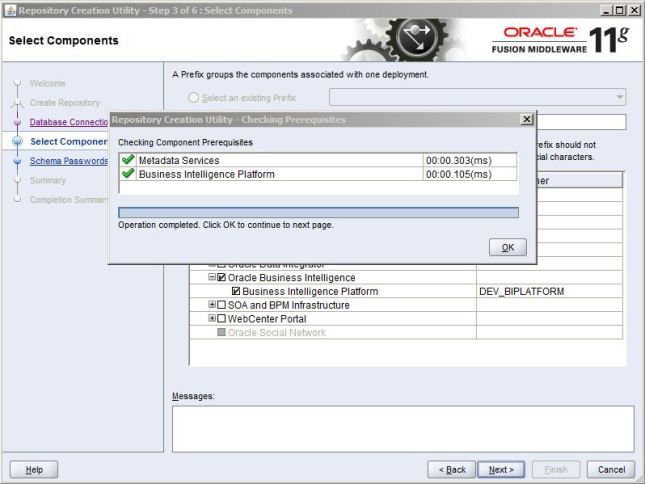
RCU checks the Prerequisites. Once it is completed click OK and then Next.


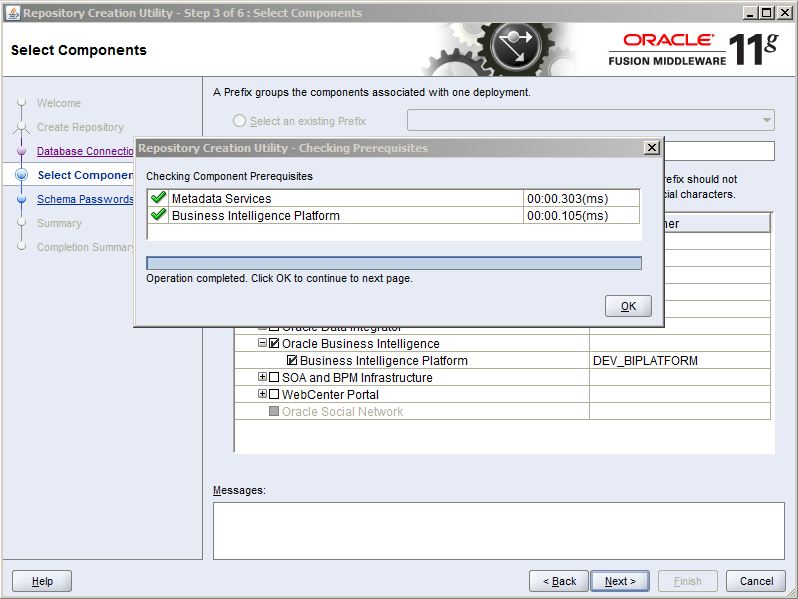
Under the Components Select DEV_MDS and DEV_BIPLATFORM and then click Next.


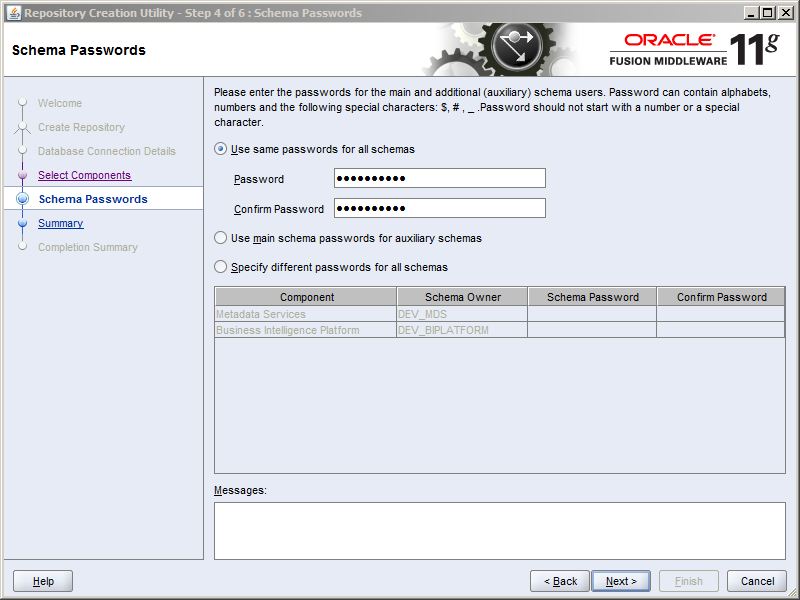
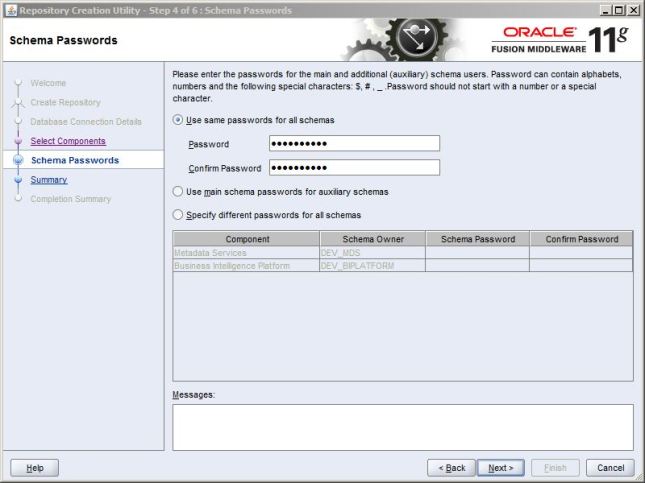
You can either give the same password for all the schemas or specify different passwords. In my case, I have chosen the same passwords for all the schemas.Click Next


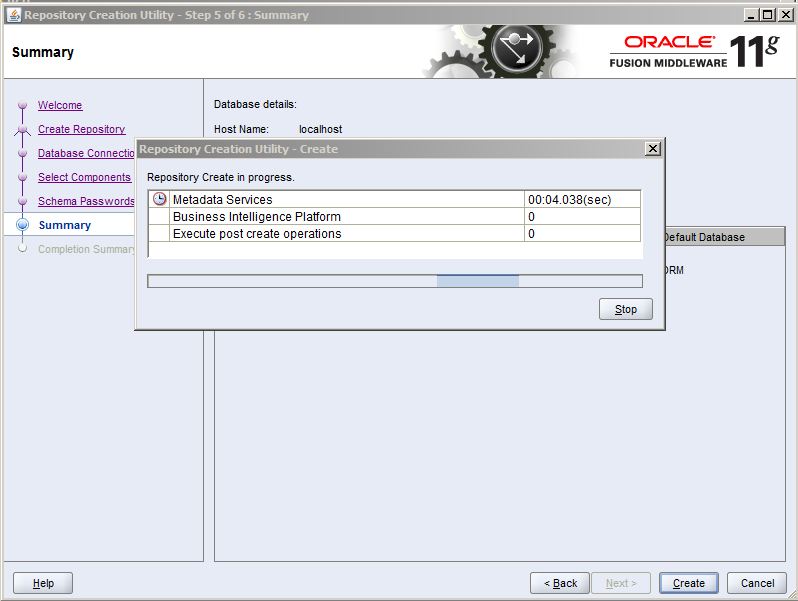
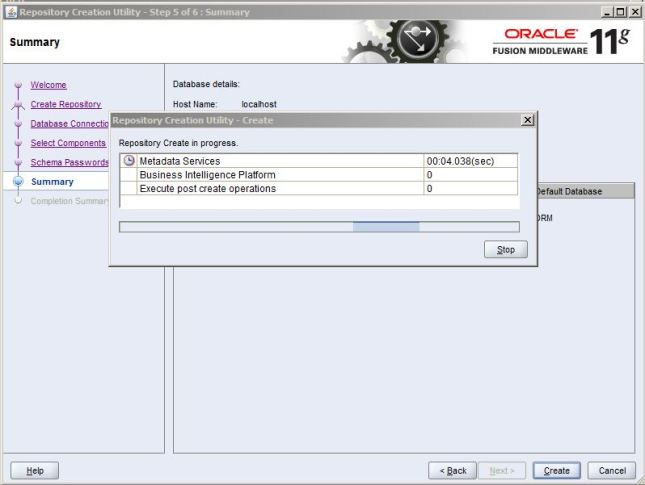
The RCU starts creating all the necessary tables.


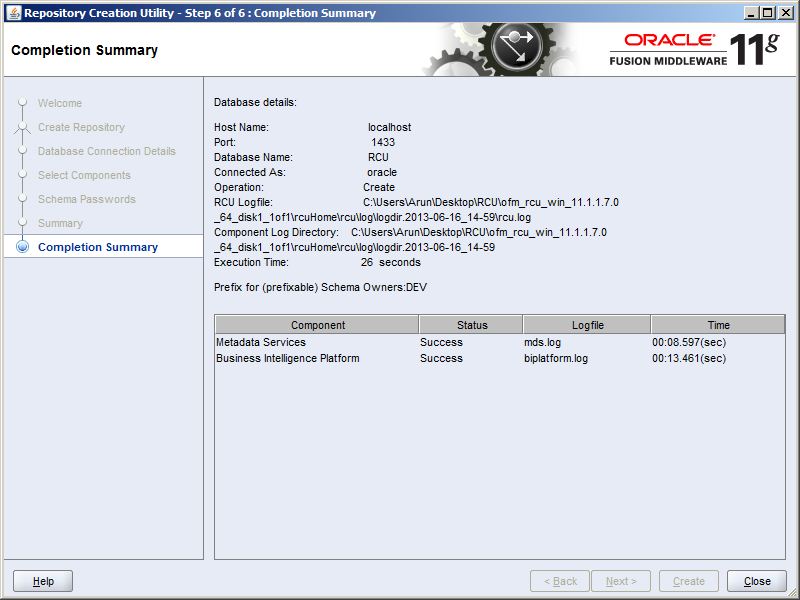
Once the tables are created. You can look into the summary of the installation.
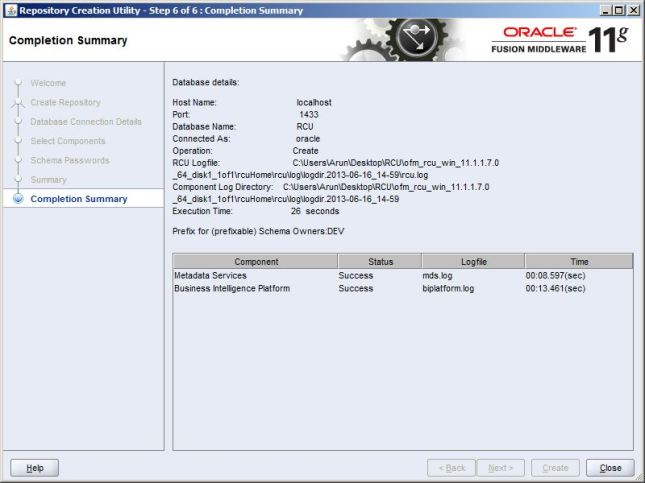


That completes the Installation of RCU.
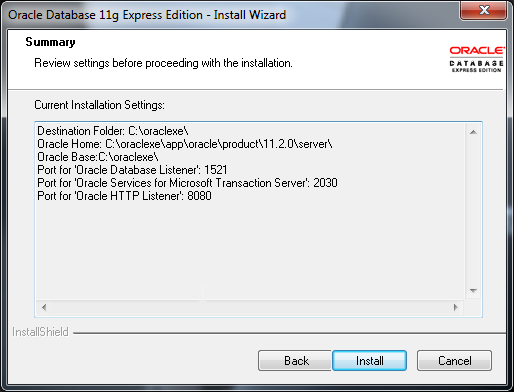
Oracle Database 11g Xpress Edition Installtion Steps


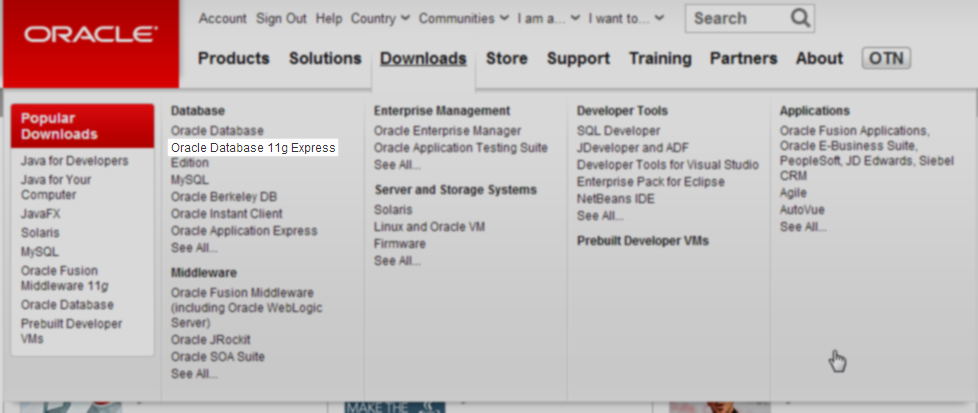
The first step in installing Oracle Database XE is to download the latest version from Oracle’s website. This can be found in Downloads tab on any their pages.

For Installation of Oracle 11g Enterprise Edition click here


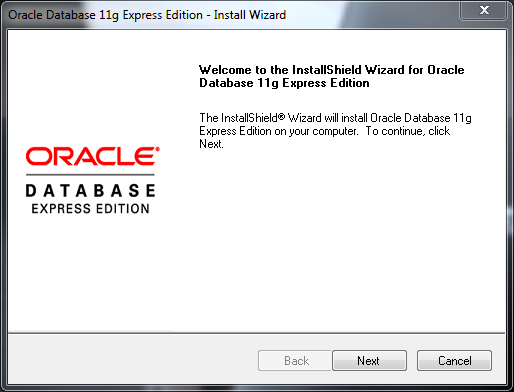
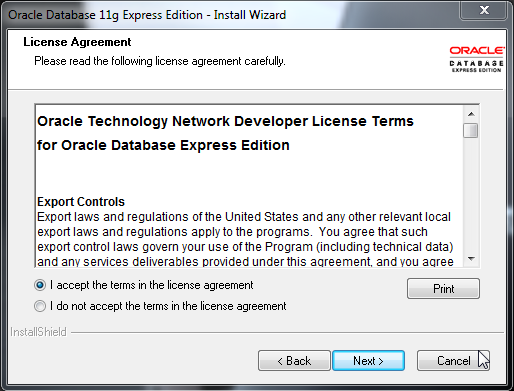
Once the download is complete, extract the archive and run the setup.exefile under the DISK1 directory. Once the installer loads, step through the installation.


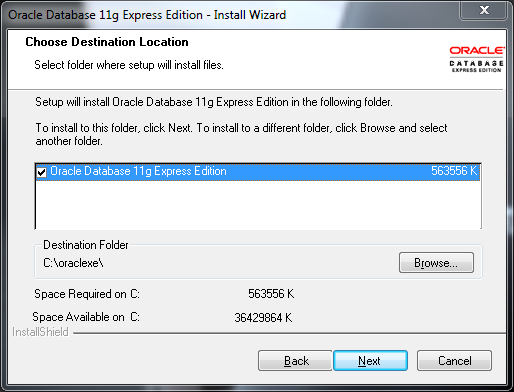
If you want to install The software in a non-standard location, you can do so on the Choose Destination Location screen.

For Installation of Oracle 11g Enterprise Edition click here


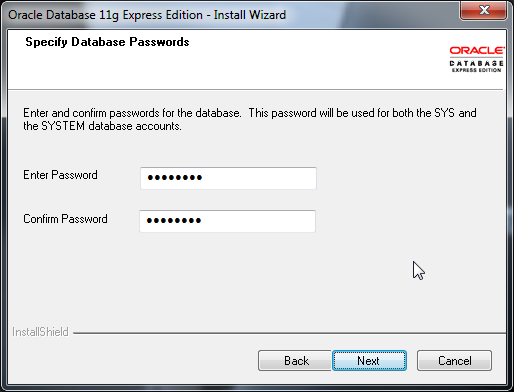
Make sure to choose a safe password that you can remember. You will need this password to make any changes to your database.


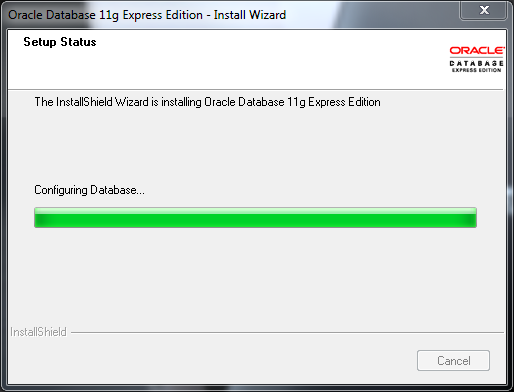
Once the installer finishes, your installation will be complete. The system will automatically start the database running in the background. You can find tools for administering the database in your start menu under Oracle Database 11g Express Edition in your application menu. These tools can be use to start, stop, backup, or restore the database.

For Installation of Oracle 11g Enterprise Edition click here

Installing Microsoft Loopback Adapter for OBIEE 11g

OBIEE software is host driven, the hostname or the IP address of the host is very important for the components to communicate with each other. Generally the VM provided will be in DHCP environment where the ip address keeps changing dynamically. to overcome this drawback we will go with loopback adapter and use the IP for all the configurations.


Lets get to the steps to configure Microsoft Loopback Adapter.


Step 1 : Installing Loopback Adapter

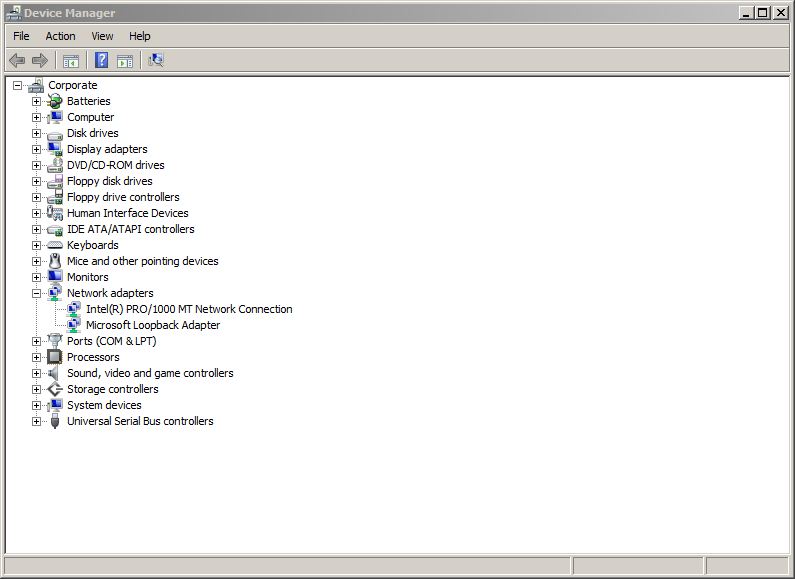
Go to run ( Windows + R ) and type devmgmt.msc and click OK.


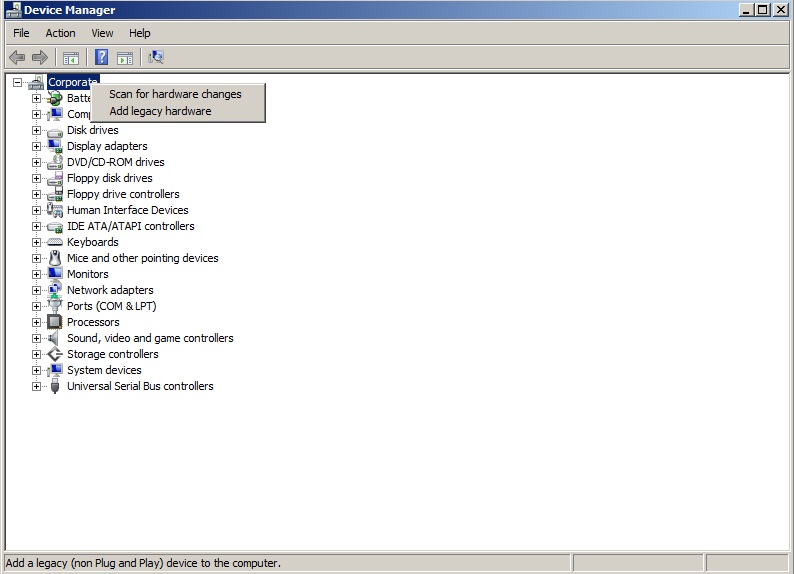
Now right Click on the Computer Name and Select Add Legacy Hardware as shown in the screenshot below.


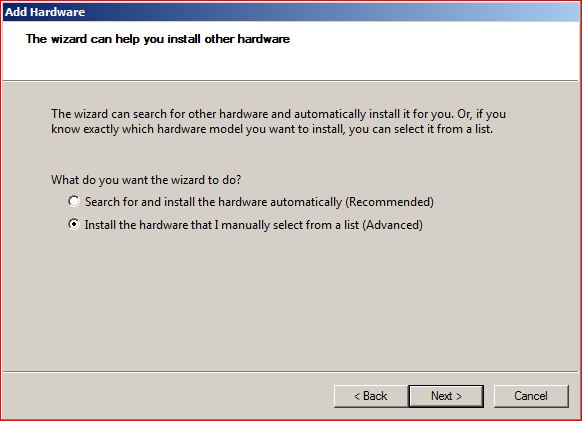
From the hardware window. Select Install the hardware that I manually select from a list (Advanced) radio button and click next.


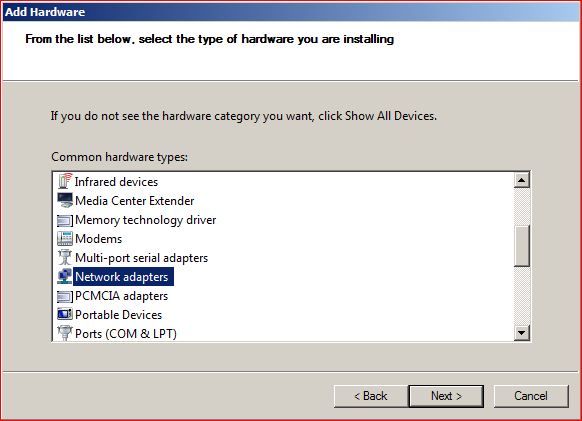
From the Hardware Types list. Select Network Adapters and click Next.


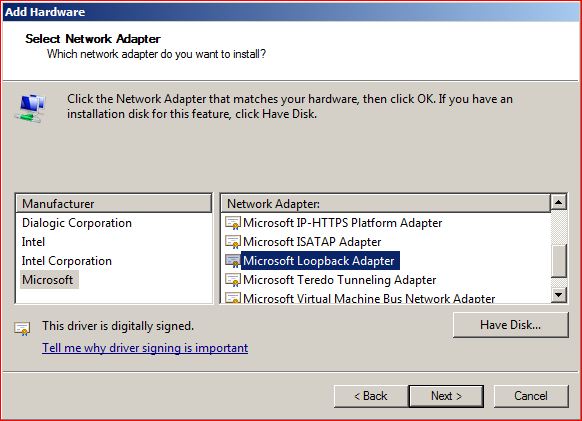
From the list Select Microsoft as manufacturers (Left Side) and Microsoft Loopback Adapter on the right side and click Next.


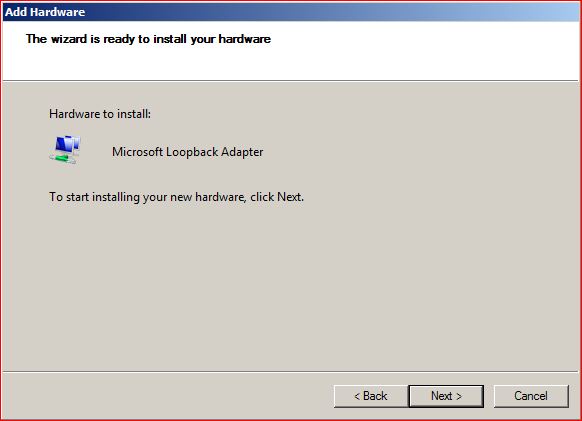
The wizard will install Microsoft Loopback Adapter.


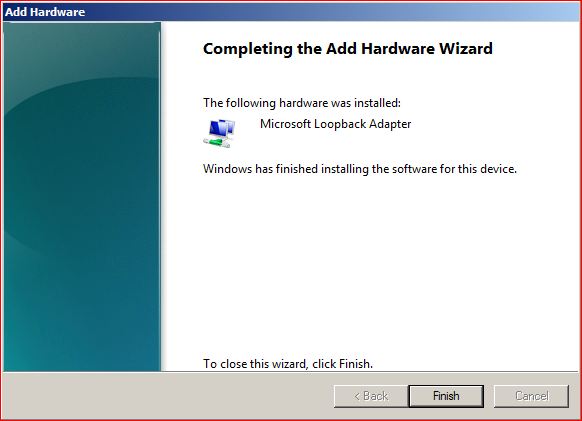
Once the wizard completes the installation. Click Finish.


Now you will see the Microsoft Loopback Adapter under the Network Adapters on Device manager window.


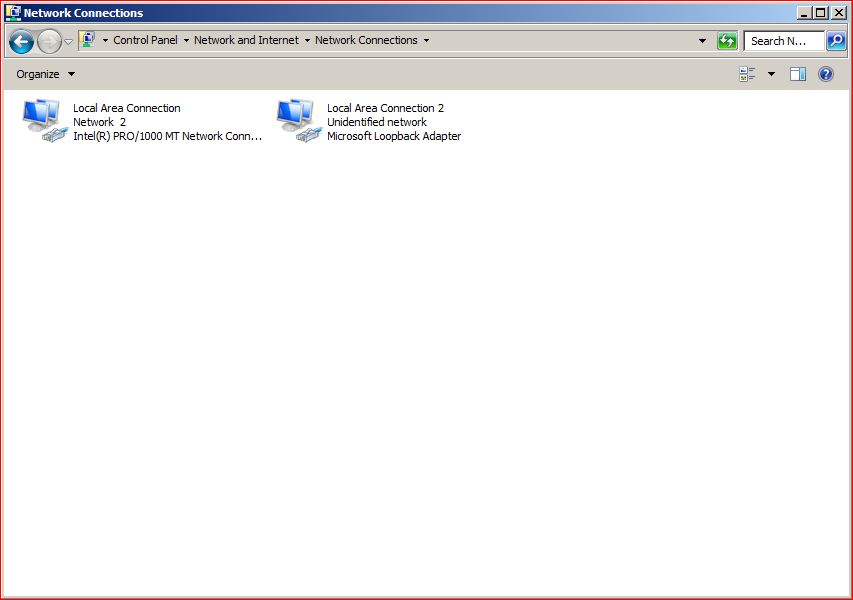
Now go to Control Panel. Click on Network & Sharing Center and select change adapter settings on the network sharing window.


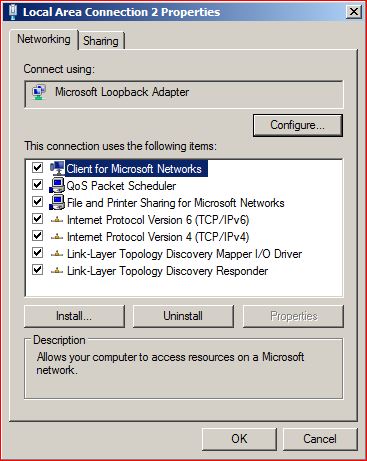
Click on Properties on the Loopback Adapter.


Deselect every check box except Internet Protocol Version 6 and 4.
Now click on Internet Protocol Version 4 Properties as shown below and enter
IP Address: 10.10.10.10
Subnet Mask: 255.255.255.0


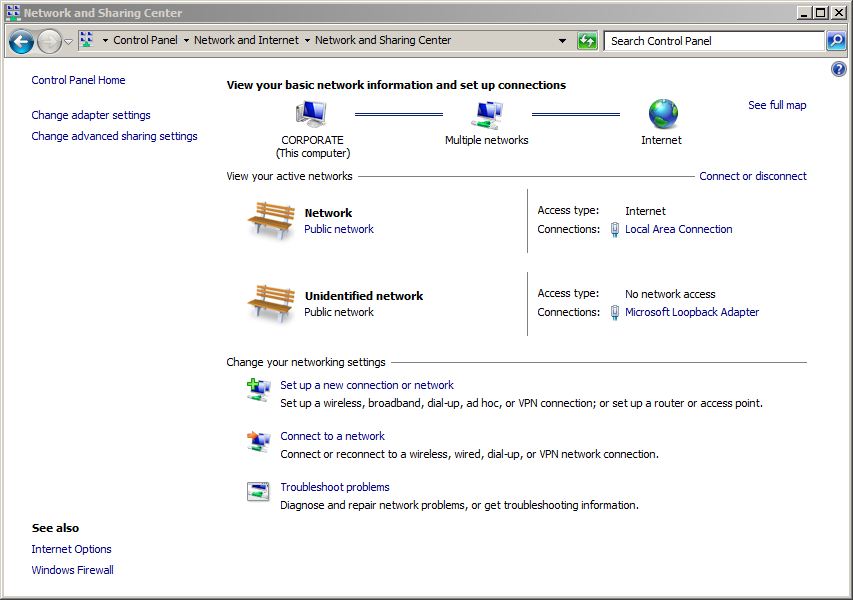
Click OK. Now Microsoft Loopback Adapter will show under the active networks.


That completes the installation of Microsoft Loopback Adapter, Now we have to add this in the hosts file.


Step 2 : Configuring Loopback Adapter

Go to Run (Windows+ R) and type drivers and click OK.


In the etc folder there is file named hosts open the file and add a new line with the IP address and hostname as below and save.

                      10.10.10.10       localhost

This completes the configuration of Microsoft Loopback Adapter.


OBIEE 11g installation and pre installation settings

Now I am back to the start where I have started my career as a BI Consultant. The first thing that I learnt and struggled with Google to understand each and every step which later was done hundreds of times. Its the installation of OBIEE 11g.

Lets get into the topic, we can break the whole installation part into four pieces.

Now lets see why we need all these and how they play their role in installation of OBIEE 11g. The major parts of OBIEE 11g installation are RCU and OBIEE itself.

Repository Creation Utility - This is a utility given by oracle to create necessary schemas for the OBIEE installation to use.

So in order to create the necessary schemas we need a Database, this is where it acts as a pre requisite before we go for RCU.

And the other important step is Configuring Microsoft Loop back Adapter which is standalone and can be done much before starting the database installation but it has to be done before OBIEE installation , the reason for this is because most of the VM we use are with DHCP(Dynamic Host Configuration Protocol) Environment. Importantly you can skip this step if you're using a server with static IP address.


Sunday, February 1, 2015

Difference between ODBC and OCI connections

This is basic as we all are aware that OBIEE supports both ODBC and OCI, most importantly we can use both to connect to a Oracle DB. But oracle suggests us to use OCI when we connect to a Oracle DB, and surprisingly we do it. The big question here is WHY ?

Let us now see what each of them are and then how they are different.

ODBC:- Open DataBase Connectivity, which is known as Universal Data Connector.
OCI:- Oracle Call Interface,Normally connects to Oracle Source.

Hence, both can connect to Oracle Sources.If we are using ODBC to connect Oracle source then we need to give ODBC connection details in the machine from which we are connecting. However OCI is a Native Connection, which doesnt require having ODBC Connection in the machine.

To the question WHY OCI ? following are the reasons:


  • OCI is optimized for queries. Transparent prefetch buffers reduce round-trips and improve performance and scalability. As a result, there is reduced memory usage on the server.
  • OCI is optimized for round-trips. No-reply requests are batched until the next call is generated for the server. This allows certain calls to be lazily propagated.
  • OCI is thread safe. You do not need to mutex (use mutual exclusivity locks) any of the OCI handles. ODBC is not thread safe, so you have to mutex most data structures.
  • OCI provides an asynchronous event notification API for active databases.
  • OCI provides enhanced array data manipulation language (DML) operations that reduce round-trips.
  • OCI returns ROWIDs for all rows selected for update in a single round-trip. Using ROWID allows for more efficient SQL access.
  • ODBC has no concept of sessions. OCI decouples connections, sessions and transactions. Multiple users can use a single connection; they get serialized on the connection for SQL operations. Multiple transactions can exist per user. This allows users to scale and service more users than there are connections available. Sessions and transactions can be migrated between connections to the same server.
  • ODBC does not support object types, large objects (LOBs), and other new Oracle datatypes.
  • ODBC affects server scalability. Using ODBC and having n number of concurrent users forces the server to have n number of processes service the clients if Oracle8i is operating in dedicated server mode. Your operating system may or may not support so many connections and processes.
  • ODBC is a wrapper around OCI so it is slower. 

Tuesday, January 6, 2015

OBIEE Cache is enabled, but why is the query not cached?

Repeatedly customers pose the question – OBIEE cache is enabled, but why is the query not cached? The reason why the queries are not cached can be of many reasons. Some of the reasons are:

Non-cacheable SQL function: If a request contains certain SQL functions, OBIEE will not cache the query. The functions are CURRENT_TIMESTAMP, CURRENT_DATE, CURRENT_TIME, RAND, POPULATE. OBIEE will also not cache queries that contain parameter markers.

Non-cacheable Table: Physical tables in the OBIEE repository can be marked ‘non-cacheable’. If a query makes a reference to a table that has been marked as non-cacheable, then the results are not cached even if all other tables are marked as cacheable.


Query got a cache hit: In general, if the query gets a cache hit on a previously cached query, then the results of the current query are not added to the cache. Note: The only exception is the query hits that are aggregate “roll-up” hits, will be added to the cache if the nqsconfig.ini parameter POPULATE_AGGREGATE_ROLLUP_HITS has been set to Yes.

Caching is not configured: Caching is not enabled in NQSConfig.ini file.


Result set too big: The query result set may have too many rows, or may consume too many bytes. The row-count limitation is controlled by the MAX_ROWS_PER_CACHE_ENTRY nqsconfig.ini parameter. The default is 100,000 rows. The query result set max-bytes is controlled by the MAX_CACHE_ENTRY_SIZE nqsconfig.ini parameter. The default value is 1 MB. Note: the 1MB default is fairly small. Data typically becomes “bigger” when it enters OBIEE. This is primarily due to Unicode expansion of strings (a 2x or 4x multiplier). In addition to Unicode expansion, rows also get wider due to : (1) column alignment (typically double-word alignment), (2) nullable column representation, and (3) pad bytes.


Bad cache configuration: This should be rare, but if the MAX_CACHE_ENTRY_SIZE parameter is bigger than the DATA_STORAGE_PATHS specified capacity, then nothing can possibly be added to the cache.

Query execution is cancelled: If the query is cancelled from the presentation server or if a timeout has occurred, cache is not created.

OBIEE Server is clustered: Only the queries that fall under “Cache Seeding” family are propagated throughout the cluster. Other queries are stored locally. If a query is generated using OBIEE Server node 1, the cache is created on OBIEE Server node 1 and is not propagated to OBIEE Server node 2

OBI Apps Informatica Performance Tuning – Teradata Response Buffer Size Optimization


Teradata Response Buffer Size

For the reader connection to source data from a Teradata database, ODBC connection is used out of the box. There is another option using piped FastExport utility connection with which there has been mixed success and will be discussed in a later blog post. OBDC can be tuned to achieve better performance in read throughput by changing the response buffer size. MaxRespSize is used to change the value in ODBC.ini. The default is 8192. The max value that can be specified is 1048576. From experience at a client site, simply specifying the max value did not help in improving the throughput. Increase the value systematically to determine the sweet spot for a network. The graph bellow illustrates throughputs achieved at different MaxRespSize values


Driver=/usr/odbc/drivers/tdata.so

Description=Teradata Linux 64-bit

DBCName=DWTESTcop1.XXXX.COM

SessionMode=Teradata

StCheckLevel=0

LastUser=

Username=

Password=

Database=

DefaultDatabase=

OutPutAsResultSet=Yes

MaxRespSize=8192