Make sure we have the database ready up and running , with valid credentials and necessary details like Hostname,Port Number and Connection String. Extract the downloaded RCU file.
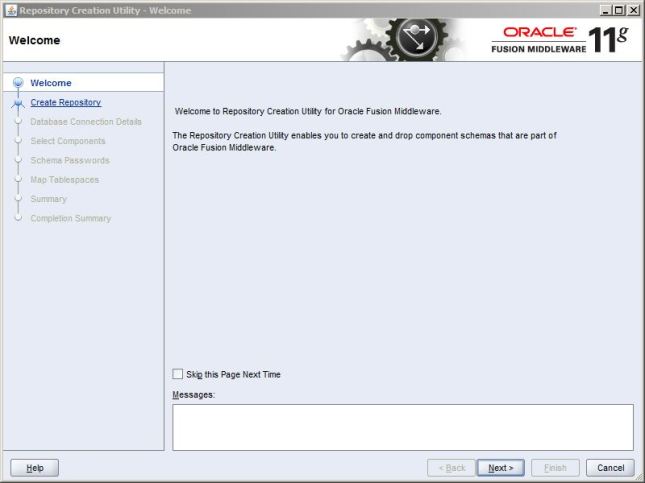
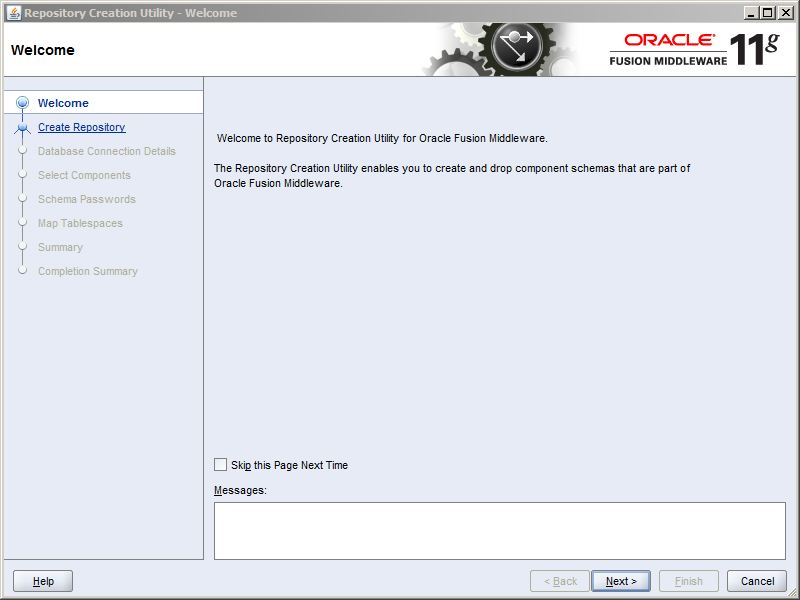
Navigate to RCU.bat which is located inside RCU folder –> BIN. The RCU Welcome screen pops up. Click Next
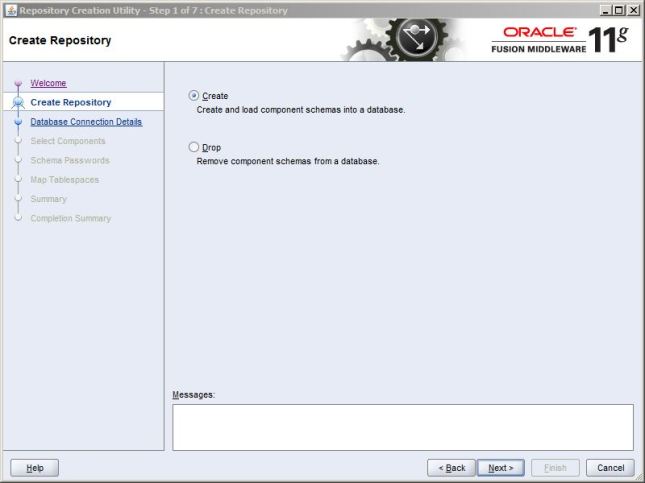
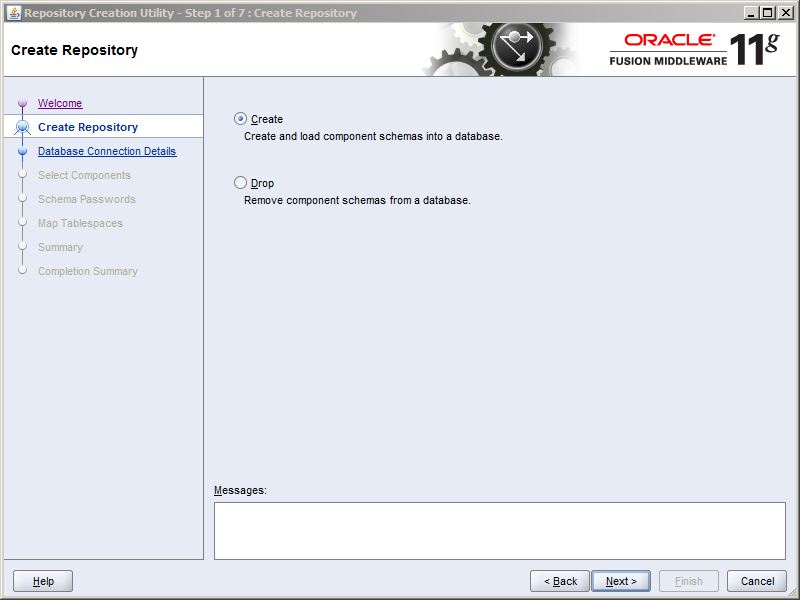
Select Create Radio button and click Next.
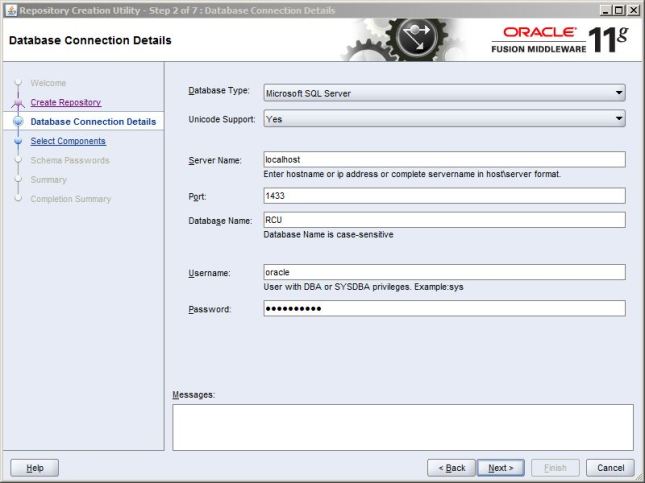
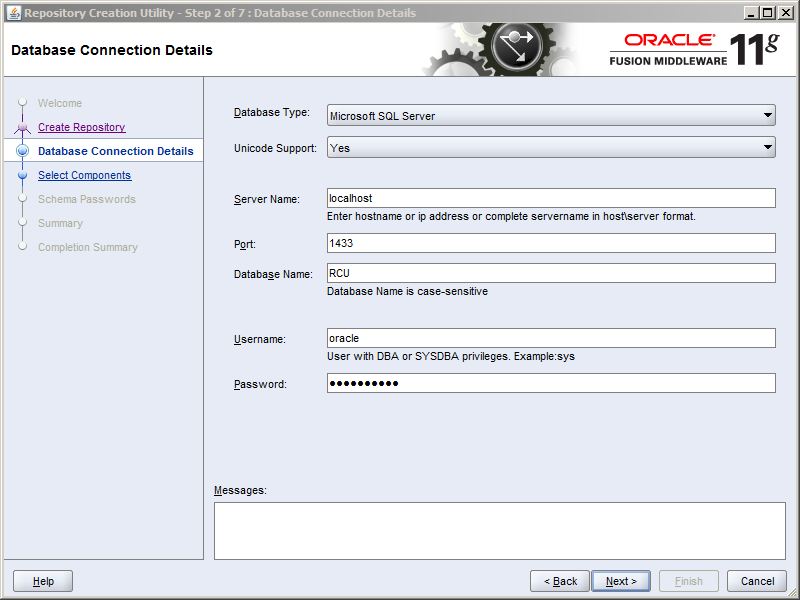
Under the Database Connection Details. Give the database details as we have collected earlier.
Server Name : Localhost
Port : 1521
Database Name : RCU
Username : Username to connect to RCU Database.
Password : Password to login to RCU Database.
Make Sure the username has DBA or SYSDBA Privileges. And then Click Next
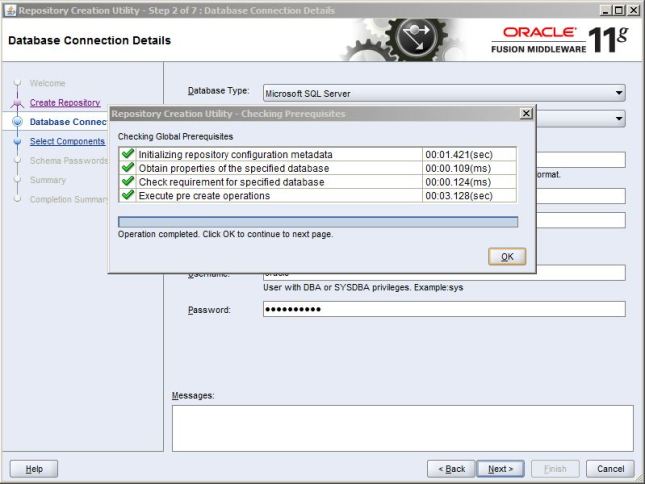
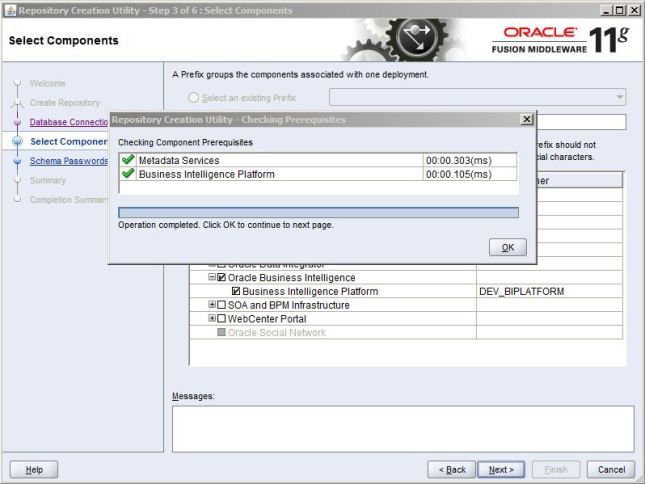
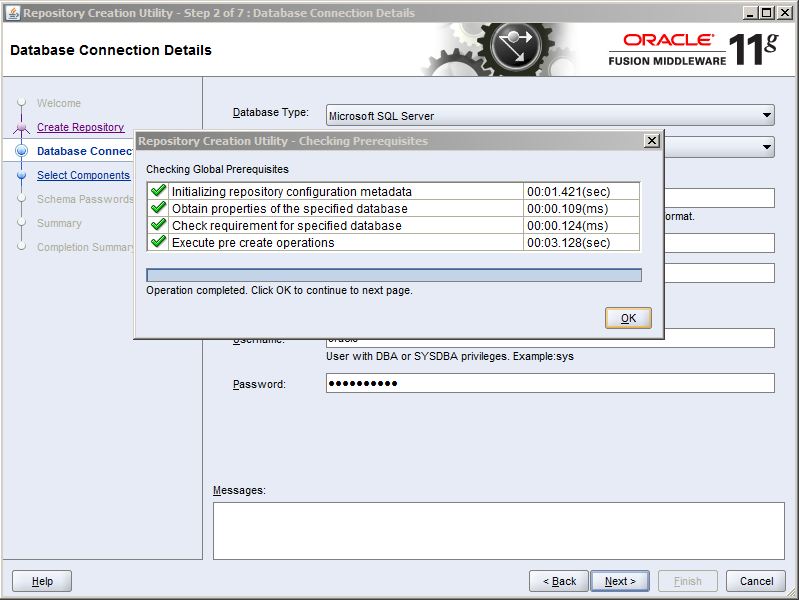
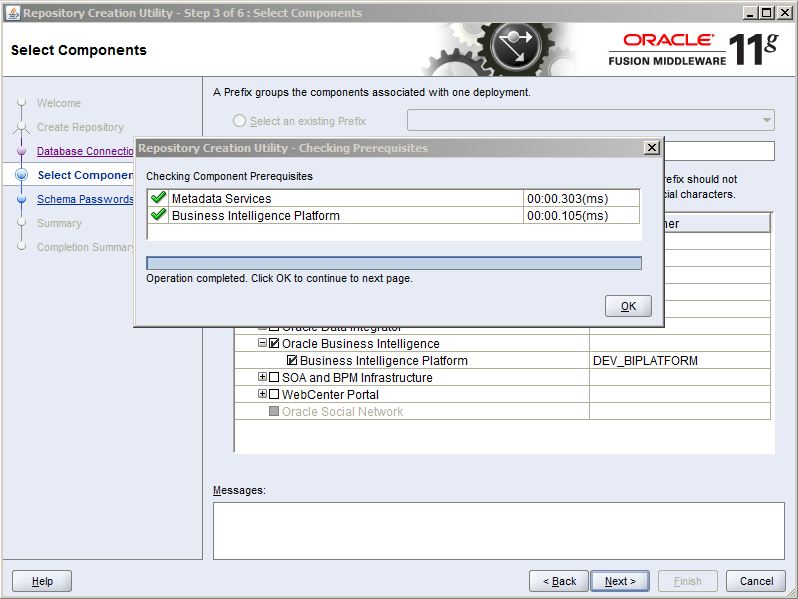
RCU checks the Prerequisites. Once it is completed click OK and then Next.
Under the Components Select DEV_MDS and DEV_BIPLATFORM and then click Next.
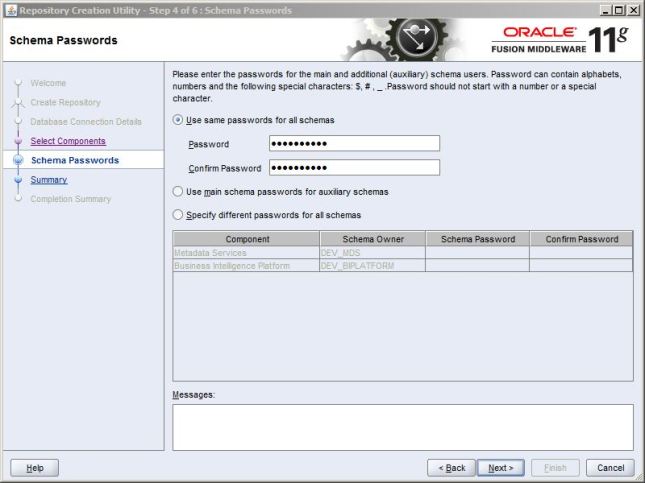
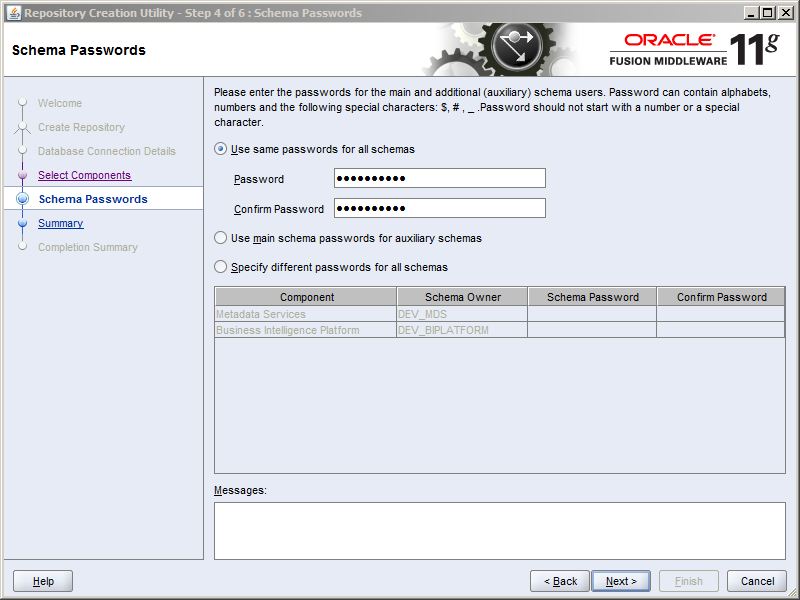
You can either give the same password for all the schemas or specify different passwords. In my case, I have chosen the same passwords for all the schemas.Click Next
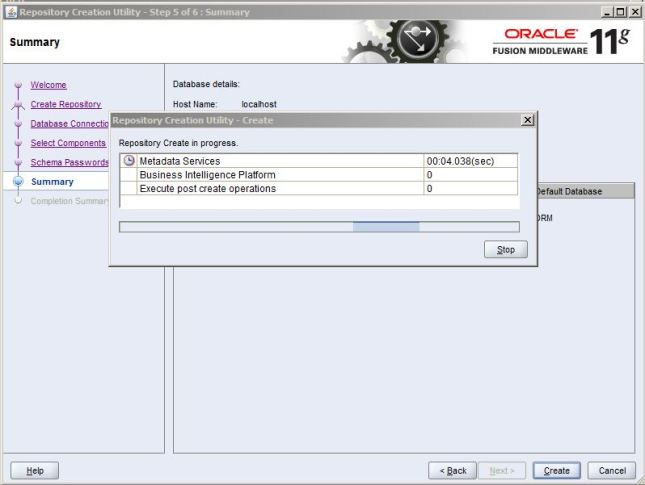
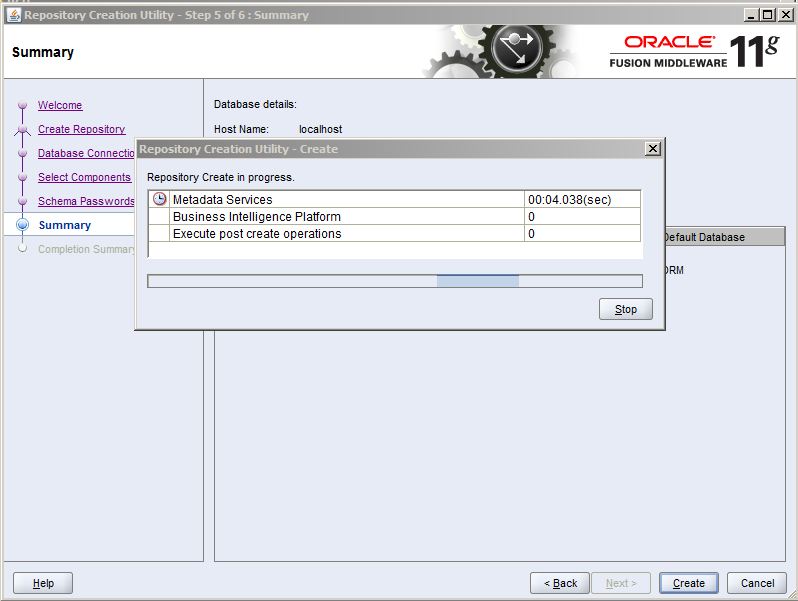
The RCU starts creating all the necessary tables.
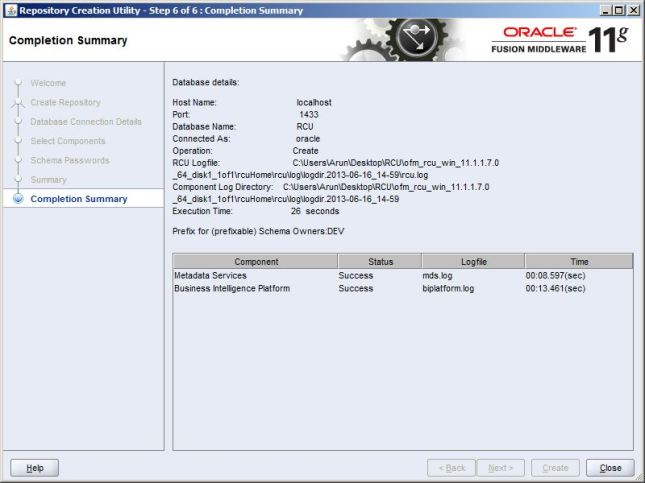
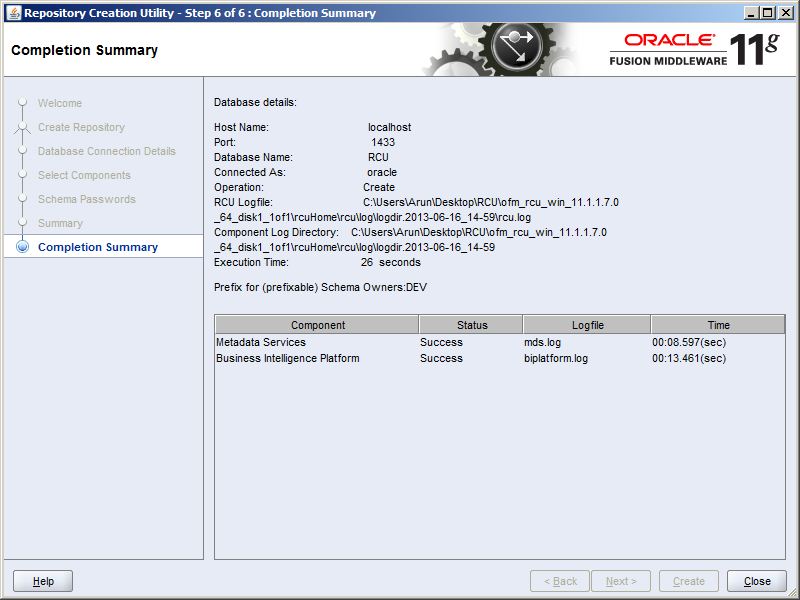
Once the tables are created. You can look into the summary of the installation.
That completes the Installation of RCU.
Select Create Radio button and click Next.
Under the Database Connection Details. Give the database details as we have collected earlier.
Server Name : Localhost
Port : 1521
Database Name : RCU
Username : Username to connect to RCU Database.
Password : Password to login to RCU Database.
Make Sure the username has DBA or SYSDBA Privileges. And then Click Next
RCU checks the Prerequisites. Once it is completed click OK and then Next.
Under the Components Select DEV_MDS and DEV_BIPLATFORM and then click Next.
You can either give the same password for all the schemas or specify different passwords. In my case, I have chosen the same passwords for all the schemas.Click Next
The RCU starts creating all the necessary tables.
Once the tables are created. You can look into the summary of the installation.
That completes the Installation of RCU.
No comments:
Post a Comment